
What happens when you combine two beloved desserts—classic tiramisu and creamy cheesecake? You get tiramisu cheesecake, a dessert that’s as indulgent as it is unforgettable. With layers of rich mascarpone, hints of coffee, and a velvety cheesecake base, this dessert is perfect for any occasion. Whether you’re a seasoned baker or just looking for a show-stopping recipe, this guide will walk you through every step. For more cheesecake inspiration, don’t miss our Snickers Strawberry Cheesecake recipe—another decadent treat that’s sure to impress. Let’s dive in!
")
Ingredients for Tiramisu Cheesecake
To make this delightful dessert, you’ll need a combination of simple, high-quality ingredients:
Cheesecake Layer
- 16 oz cream cheese (softened): The base for a rich and creamy filling.
- 1 cup granulated sugar: For sweetness.
- 3 large eggs: To bind the mixture and create a smooth texture.
- 1/2 cup sour cream: Adds a tangy note and extra creaminess.
- 1 teaspoon vanilla extract: For flavor depth.
Tiramisu Layer
- 8 oz mascarpone cheese: Essential for authentic tiramisu flavor.
- 1/2 cup heavy cream: Creates a light and airy texture.
- 1/4 cup brewed espresso or strong coffee: Brings that signature tiramisu taste.
- 1/4 cup coffee liqueur (optional): For a boozy twist.
Crust
- 1 1/2 cups crushed ladyfingers: A nod to traditional tiramisu.
- 1/4 cup unsalted butter (melted): To bind the crust.
Topping
- Unsweetened cocoa powder: A classic tiramisu garnish.
- Shaved chocolate or chocolate curls: For an elegant finish.
")
Pro Tip: Use high-quality mascarpone and fresh coffee for the best results.
Tools and Equipment Needed
Making tiramisu cheesecake is easier with the right tools:
- 9-inch springform pan: guarantees easy removal and a beautiful presentation.
- Mixing bowls: For preparing the crust, filling, and topping.
- Hand mixer or stand mixer: To achieve a smooth, creamy texture.
- Whisk and spatula: For mixing and scraping down the sides of bowls.
- Fine mesh sieve: Perfect for dusting cocoa powder evenly.
- Baking sheet: To create a water bath for the cheesecake.
Pro Tip: Line the bottom of the springform pan with parchment paper for easy transfer.
How to Make Tiramisu Cheesecake: Step-by-Step Guide
Crafting the perfect tiramisu cheesecake might sound elaborate, but with these clear steps, you’ll master it in no time. Each layer adds a unique dimension to this indulgent dessert, making it a showstopper for any occasion.
Step 1: Prepare the Crust
- Combine the Ingredients: In a mixing bowl, mix 1 ½ cups of crushed ladyfingers with ¼ cup of melted butter until the crumbs are evenly coated.
- Form the Crust: Press the crumb mixture firmly into the bottom of a greased 9-inch springform pan. Use the back of a spoon or a flat-bottomed glass for an even layer.
- Chill the Crust: Place the pan in the refrigerator while you prepare the filling. This step helps the crust set and prevents it from crumbling when sliced.
Pro Tip: If you don’t have ladyfingers, graham cracker crumbs or digestive biscuits can be a great substitute.
Step 2: Make the Cheesecake Filling
- Beat the Cream Cheese: In a large bowl, use a hand or stand mixer to beat 16 oz of cream cheese with 1 cup of sugar until smooth and fluffy.
- Add the Eggs: Incorporate 3 large eggs one at a time, mixing on low speed to prevent overbeating.
- Blend in Additional Ingredients: Mix in ½ cup sour cream and 1 teaspoon vanilla extract until fully combined.
Pro Tip: Make sure all ingredients are at room temperature for a smoother filling and to avoid lumps.
Step 3: Prepare the Tiramisu Layer
- Whip the Mascarpone: In a separate bowl, whip 8 oz of mascarpone cheese with ½ cup of heavy cream until light and fluffy.
- Infuse with Coffee: Stir in ¼ cup brewed espresso and 2 tablespoons of coffee liqueur (optional) for that signature tiramisu flavor. Adjust the coffee intensity to suit your taste.
Pro Tip: For a non-alcoholic version, replace coffee liqueur with vanilla extract or an extra splash of espresso.
Step 4: Assemble the Cheesecake
- Layer the Filling: Pour half of the cream cheese filling over the chilled crust, spreading it evenly with a spatula.
- Add the Tiramisu Layer: Gently spread the mascarpone mixture on top of the first cheesecake layer.
- Top It Off: Finish with the remaining cheesecake filling, smoothing the top for a polished look.
Pro Tip: Tap the pan gently on the counter to release any trapped air bubbles for a smoother finish.
Step 5: Bake the Cheesecake
- Preheat the Oven: Set your oven to 325°F.
- Prepare the Water Bath: Place the springform pan in a larger baking dish. Carefully pour hot water into the outer dish until it reaches halfway up the side of the springform pan.
- Bake: Bake for 60-70 minutes. The center should jiggle slightly but look set when done.
Pro Tip: The water bath prevents cracking and guarantees even baking, so don’t skip this step.
")
Step 6: Cool and Chill
- Cool Gradually: Turn off the oven and crack the door open. Allow the cheesecake to cool inside for 1 hour to avoid sudden temperature changes that can cause cracking.
- Refrigerate: Transfer the cheesecake to the refrigerator and chill for at least 4 hours or overnight for the best texture and flavor.
Pro Tip: Cover the cheesecake loosely with plastic wrap to prevent it from absorbing fridge odors.
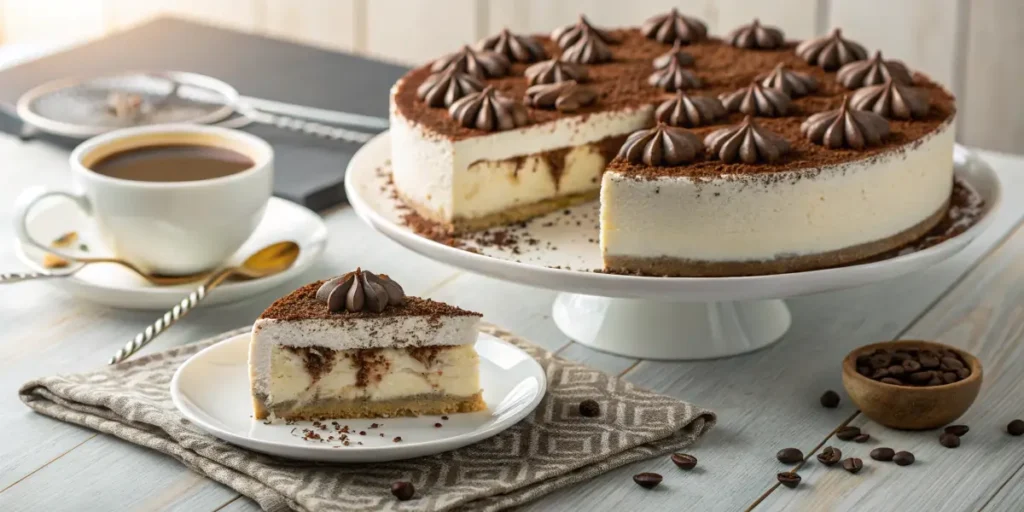
Step 7: Garnish and Serve
- Dust with Cocoa: Use a fine mesh sieve to dust unsweetened cocoa powder evenly over the top.
- Add Chocolate Shavings: Garnish with shaved chocolate or chocolate curls for a touch of elegance.
- Slice and Serve: Warm your knife under hot water, dry it with a towel, and slice the cheesecake for clean, sharp edges.
Pro Tip: Serve with a dollop of whipped cream and an espresso shot for a truly decadent dessert experience.
By following these steps, your tiramisu cheesecake will not only look stunning but also taste heavenly. It’s a dessert that’s sure to impress at dinner parties, birthdays, or any special occasion. Enjoy!
Tips for the Perfect Tiramisu Cheesecake
- Avoid Overmixing: Overmixing the batter can introduce air, leading to cracks.
- Use Room Temperature Ingredients: Guarantees a smooth, lump-free filling.
- Prevent Water Bath Leaks: Wrap the springform pan in aluminum foil before placing it in the water bath.
- Chill Thoroughly: The cheesecake needs time to set for the best texture.
Variations of Tiramisu Cheesecake
The versatility of tiramisu cheesecake allows for endless creativity:
Chocolate Tiramisu Cheesecake
- Add melted chocolate to the cheesecake filling for a rich, chocolaty twist.
No-Bake Tiramisu Cheesecake
- Skip the baking and use gelatin to set the layers for a simpler version.
Gluten-Free Option
- Substitute gluten-free ladyfingers or graham crackers for the crust.
Berry-Infused Tiramisu Cheesecake
- Layer fresh berries between the cheesecake and tiramisu layers for a fruity addition.
Nutritional Information and Serving Size
Tiramisu cheesecake is as indulgent as it is satisfying. Here’s what you can expect:
- Calories: Approximately 350-400 per slice (based on a 12-slice cheesecake).
- Protein: Around 6-8 grams per serving, thanks to cream cheese and mascarpone.
- Fats: Primarily from dairy and eggs, providing richness and satiety.
- Carbohydrates: A mix of natural sugars from dairy and added sugars from the crust and filling.
While this dessert isn’t low-calorie, its richness guarantees that a small serving is deeply satisfying. Pair it with a fresh cup of coffee for a complete experience.
Pro Tip: Reduce sugar in the filling slightly if you prefer a less sweet dessert.
Storage and Shelf Life of Tiramisu Cheesecake
To maintain the freshness and flavor of your tiramisu cheesecake, proper storage is essential.
Refrigeration
- Cover the cheesecake tightly with plastic wrap or transfer it to an airtight container.
- Store in the refrigerator for up to 5 days.
Freezing
- Slice the cheesecake and wrap each piece individually in plastic wrap.
- Place the wrapped slices in a freezer-safe bag or container.
- Freeze for up to 3 months. Thaw in the refrigerator overnight before serving.
Pro Tip: Add cocoa powder or garnish just before serving to keep it looking fresh.
Serving Suggestions for Tiramisu Cheesecake
Tiramisu cheesecake shines as a dessert centerpiece but can be served in creative ways to suit any occasion.
- Classic Presentation: Dust with cocoa powder and garnish with shaved chocolate for an elegant look.
- Paired with Coffee: Serve alongside a cup of freshly brewed espresso or cappuccino for a true Italian experience.
- Layered Garnishes: Top with whipped cream, a drizzle of coffee liqueur, or fresh berries for extra flair.
- Mini Cheesecakes: Make individual portions in ramekins for a fun twist.
Pro Tip: Let the cheesecake sit at room temperature for 10-15 minutes before serving to bring out its full flavor.
FAQs
What is tiramisu cheesecake made of?
Tiramisu cheesecake is made from layers of cream cheese, mascarpone, espresso-soaked ladyfingers, and a dusting of cocoa powder, all atop a buttery crust.
What is the secret of tiramisu?
The secret to authentic tiramisu lies in using high-quality mascarpone, freshly brewed espresso, and just the right balance of sweetness and bitterness.
Is mascarpone cheese the same as cream cheese in tiramisu?
While both are creamy, mascarpone is richer and less tangy than cream cheese, giving tiramisu its signature smoothness.
Does all tiramisu cake have alcohol?
Not all tiramisu includes alcohol. While traditional recipes use coffee liqueur, you can substitute it with vanilla extract or skip it entirely.
A Beginner’s Guide to Baking Tiramisu Cheesecake
Baking your first tiramisu cheesecake is simpler than it seems. Follow these steps:
- Start with a sturdy crust made from ladyfingers or graham crackers.
- Combine mascarpone and cream cheese for a creamy filling.
- Infuse the batter with espresso for that authentic tiramisu flavor.
- Use a water bath to bake the cheesecake evenly and prevent cracking.
- Chill overnight for the best texture and flavor.
Pro Tip: Don’t rush the chilling process; it’s essential for achieving the perfect consistency.
Advanced Tips for Tiramisu Cheesecake Enthusiasts
- Layering Excellence: Alternate cheesecake and tiramisu layers for a stunning visual effect.
- Coffee Soak: Use freshly brewed espresso to soak the ladyfingers for maximum flavor.
- Add a Twist: Incorporate flavors like hazelnut, caramel, or even a hint of orange zest for variety.
Pro Tip: A touch of dark rum or amaretto in the batter adds depth and complexity.
The Cultural Appeal of Tiramisu Cheesecake
Tiramisu and cheesecake both have deep cultural roots. Combining these iconic desserts creates a fusion that appeals to fans of both classic Italian and American desserts. It’s a testament to the adaptability of traditional recipes, bringing together the best of two culinary worlds.
Homemade vs. Store-Bought Tiramisu Cheesecake
Homemade
- Customizable: Adjust the sweetness, coffee intensity, or liqueur level to your liking.
- Fresher Taste: Made with high-quality ingredients and no preservatives.
- Satisfaction: The joy of baking and sharing something made from scratch.
Store-Bought
- Convenience: Ready to serve and ideal for last-minute gatherings.
- Consistency: Standardized recipes guarantee predictable flavor and texture.
Pro Tip: If buying from a store, look for brands that use mascarpone and real coffee for an authentic taste.
Conclusion
Tiramisu cheesecake is more than just a dessert; it’s a culinary experience that combines the best of two worlds. From its creamy layers to its coffee-kissed undertones, this dessert is perfect for any celebration or casual treat. Whether you choose to bake it at home or pick up a ready-made version, one thing is certain—tiramisu cheesecake is a showstopper that never disappoints.
Ready to indulge? Grab your ingredients and make this delightful dessert today!
